
Views: 0 Author: Site Editor Publish Time: 2026-06-16 Origin: Site


You are likely researching this topic because a power running board has failed, become stuck, or started making unusual noises. It is incredibly frustrating when a premium vehicle feature suddenly transforms into a daily nuisance. You open your door expecting a helpful step, but instead, you get a grinding sound or no movement at all.
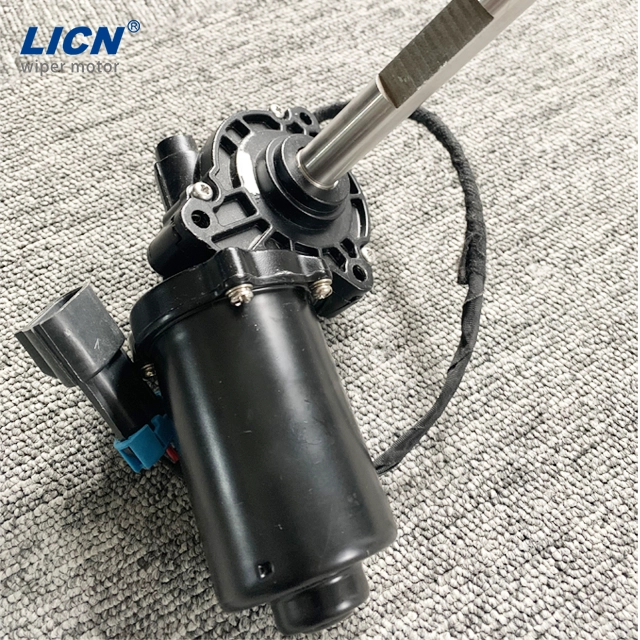
The core component at fault is usually the side step motor. We define this unit as the primary electrical and mechanical actuator responsible for deploying and retracting automated running boards. When it breaks down, your vehicle loses accessibility. A stuck running board also creates immediate ground-clearance hazards over speed bumps or rough terrain.
Our goal is to help you diagnose these frustrating step motor issues accurately. We will help you evaluate available replacement options between OEM parts and aftermarket alternatives. By the end of this guide, you will know exactly how to troubleshoot failing units and make an informed, confident purchasing decision.
Function: A side step motor drives the mechanical hinge of a power running board, triggered by the vehicle’s door sensors.
Failure Symptoms: Grinding noises, sluggish movement, or boards stuck in deployed/retracted positions are primary indicators of motor or hinge failure.
Root Causes: Environmental debris (road salt, mud, ice) and lack of hinge lubrication are the leading causes of step motor burnout.
Buying Decision: Choosing between OEM and aftermarket replacements requires verifying OE cross-reference numbers, evaluating weather-sealing upgrades, and comparing warranty terms.
Understanding the internal mechanics helps you quickly pinpoint where a failure occurs. The Side Step Motor operates as a specialized direct-current actuator. It rarely works alone. It integrates seamlessly into a broader mechanical assembly. The unit primarily consists of three major components.
First, you have the electric motor itself. This compact DC motor generates the initial rotational force. Second, you will find an internal gear drive. These gears step down the high-speed rotation of the electric motor into low-speed, high-torque power. This torque pushes the heavy running board down. Finally, the mounting bracket assembly physically secures everything to the vehicle frame.
System integration relies heavily on your vehicle’s control modules. When you open a door, a magnetic or mechanical door sensor sends a signal. The control module receives this signal and instantly routes power to the motor. The gears turn, and the running board deploys. When you close the door, the module reverses the electrical polarity. The motor spins backward, tucking the board safely against the rocker panel.
Modern side step systems also incorporate vital safety mechanisms to protect users and the hardware itself. You should be aware of these features:
Anti-Pinch Technology: Advanced systems monitor the electrical current draw. If a foot blocks the board from retracting, the current spikes. The module detects this spike and reverses the motor instantly to prevent injury.
Load Sensors: These sensors detect abnormal physical resistance. They prevent the motor from burning out if the board hits a high curb or a rock outcropping.
Time-Out Relays: If the motor runs longer than a few seconds without completing its cycle, the relay cuts power. This prevents overheating when the hinges become heavily bound by dirt.
Many owners replace the motor prematurely when the real issue lies elsewhere. Proper symptom isolation saves you time and frustration. You must distinguish between true electrical failures and mechanical binding within the hinge system.
Audible cues give you the best diagnostic starting point. Listen closely when you open the vehicle door. If you hear loud clicking or harsh grinding, you likely have stripped internal gears. The electric motor is working, but the mechanical transmission inside the unit has failed. Conversely, total silence points to an electrical issue. A completely silent Step Motor suggests a dead internal armature, a blown fuse, or a severed wiring harness.
Physical symptoms also tell a distinct story. Erratic deployment often indicates a failing internal sensor. Sometimes the board moves a few inches and suddenly stops. This usually means the anti-pinch safety mechanism triggered incorrectly due to high resistance. In some cases, a failing motor can even drain your vehicle battery. An internal short might cause a continuous parasitic power draw while the vehicle sits parked.
Before purchasing replacement parts, you should perform a critical trust and verification step. Follow this basic diagnostic workflow:
Disconnect the mechanical linkage separating the motor from the running board hinge.
Thoroughly clean the pivot points of the mechanical hinges using a stiff brush and compressed air.
Apply a heavy-duty penetrating lubricant directly to the hinge pins. Manually move the board up and down to work the oil into the joints.
Test the isolated motor electronically. If the disconnected motor spins freely, your original problem was a bound hinge, not a dead motor.
A physically bound hinge forces the motor to overwork. The electrical system detects this high load and shuts the motor off. This safety shut-off perfectly mimics a total motor failure. Always verify hinge movement before assuming the actuator is dead.
Automotive components mounted beneath the chassis endure brutal conditions. Environmental hazards represent the leading cause of premature step motor failure. You cannot completely avoid these risks, but understanding them helps you mitigate long-term damage.
Weather and road debris attack the motor daily. When you drive through winter weather, your tires throw a corrosive mixture of road salt, heavy mud, and slush directly onto the bracket assembly. Freezing temperatures exacerbate the issue. Water seeps into the micro-gaps around the motor housing. When that water freezes, it expands. This expansion compromises the factory weather seals. Once a seal breaks, water infiltrates the internal electronics.
Corrosion is a silent but aggressive killer of these components. Galvanic corrosion occurs when dissimilar metals contact each other in a saltwater environment. Many luxury SUVs and trucks feature aluminum bracket assemblies paired with steel mounting bolts. The road salt acts as an electrolyte. Over time, the aluminum bracket oxidizes heavily. This corrosion swells the metal, binds the pivot points, and degrades the electrical connectors.
Wear and tear also takes a steady toll. The internal gears face massive stress loads. Every time someone steps onto the running board, the gears hold that weight in place. Over thousands of cycles, the internal plastic or metal gears inevitably wear down. High passenger loads accelerate this lifecycle limit.
When you confirm a motor failure, you must decide between OEM (Original Equipment Manufacturer) parts and aftermarket alternatives. Each path carries specific advantages and distinct drawbacks.
OEM Parts, such as GM Genuine or Mopar components, offer a straightforward replacement experience. The primary advantage is guaranteed exact fitment. You face zero module reprogramming risks because the factory control unit recognizes the part immediately. You also receive a standard dealership warranty. However, OEM parts carry a significantly higher price point. More importantly, buying OEM means you might purchase a part with the exact same design flaws that caused your original failure.
Aftermarket or third-party replacements offer compelling alternatives. They provide much higher cost-efficiency. Some reputable aftermarket brands engineer specific upgrades into their units. You might find "Gen 2" or "Gen 3" iterations featuring upgraded weather sealing or forged metal internal gears instead of factory plastic. The downside is variable quality control. Buying aftermarket requires strict attention to fitment notes, and warranty terms can be difficult to enforce.
When evaluating options, we recommend prioritizing sellers who provide exact OE cross-reference numbers. Transparent warranty policies also indicate a trustworthy manufacturer.
Comparing Replacement Options | ||
Feature | OEM Motors | Aftermarket Motors |
|---|---|---|
Fitment Accuracy | 100% Guaranteed Exact Fit | Variable (Check OE numbers carefully) |
Initial Purchase Price | High (Premium Dealership Markup) | Low to Moderate (Highly Competitive) |
Design Improvements | Rare (Maintains original factory design) | Common (Upgraded seals, metal gears) |
Warranty Support | Standard network-wide dealership support | Dependent entirely on the specific vendor |
Buying the wrong part wastes time and money. You need a strict methodology when shortlisting your replacement. A minor mismatch in year or trim level can result in a part that simply will not bolt onto your frame.
You must verify all fitment data meticulously. Never rely solely on the generic vehicle make and model. Emphasize checking the exact Year, Make, Model, and specific Trim package. Automakers frequently change wiring harness styles midway through a production year. A 2018 early-build motor might not fit a 2018 late-build truck.
Positioning absolutely matters. Driver-side (Left) and passenger-side (Right) motors are uniquely mirrored. They are almost never interchangeable. If your driver-side board fails, buying a generic "step motor" without specifying the side will likely end in a frustrating return process. Always double-check the directional listing.
Consider the tradeoff between an assembly versus a motor-only purchase. Buying just the replacement motor is cheaper, but it requires labor-intensive disassembly of the rusted original bracket. Buying the entire motor-and-bracket assembly costs more upfront but dramatically reduces your installation time. You just unbolt the old bracket and bolt the new one on.
Finally, check for hardware inclusion. Corroded bolts frequently snap during removal. A premium replacement kit should include necessary replacement wedges, hardened mounting bolts, and weather-sealed wiring harnesses. Review our verification chart below before completing checkout.
Pre-Purchase Verification Chart | ||
Verification Step | Action Required | Risk if Ignored |
|---|---|---|
OE Part Match | Cross-reference original part number | Wiring harness will not connect |
Directional Check | Confirm Left (Driver) or Right (Passenger) | Mounting bolt holes will be mirrored |
Hardware Audit | Ensure new mounting bolts are included | Stalled installation due to broken old bolts |
Knowing what to expect during installation determines whether you tackle this project yourself or hire a shop. Replacing a step motor sits squarely in the intermediate DIY category. It is highly feasible at home if you prepare correctly.
For DIY feasibility, you need specific tools. You will require heavy-duty jack stands to safely support the vehicle. Basic socket sets are mandatory. Because these components live under the chassis, rust is your biggest enemy. You must soak all mounting bolts in a high-quality penetrating fluid at least 24 hours before you begin wrenching.
You must actively manage common DIY risks. Snapping a corroded mounting bolt inside the frame rail turns a two-hour job into a weekend nightmare. Use hand tools rather than aggressive impact wrenches when initially breaking bolts loose. Safety is another major concern. Running boards are surprisingly heavy. You must safely support the board with a floor jack during removal. If the motor suddenly frees up, the heavy board can swing down violently and cause injury.
Sometimes, DIY is not the right choice. We recommend professional installation under a few specific conditions. If your vehicle requires specialized OBD2 diagnostic tools to recalibrate the running board control module, let a shop handle it. Furthermore, if you discover the main vehicle wiring harness is heavily corroded or melted, you need professional electrical repair. Splicing damaged high-amperage chassis wires requires expert attention.
Resolving automated running board issues requires a methodical approach. By isolating the symptoms early, you avoid throwing expensive parts at a simple mechanical bind. The critical path involves diagnosing the physical hinge first, matching the exact OE part number, and evaluating aftermarket options that offer improved weather sealing. We recommend keeping these actionable steps in mind:
Clean and lubricate the hinges thoroughly before condemning the electric motor.
Locate the OEM part number stamped directly on your broken unit to ensure accurate cross-referencing.
Buy a complete assembly rather than a motor-only kit if your current bracket shows heavy galvanic corrosion.
Soak all factory mounting bolts in rust penetrant for a full day before attempting installation.
We encourage prompt replacement of a failing unit. Restoring your vehicle's accessibility improves daily convenience and eliminates the severe ground-clearance hazards created by a permanently deployed board. Take the time to choose a durable replacement, and your power steps will provide reliable service for years to come.
A: Pushing the board up manually carries risks. If the motor gears are locked, forcing the board will strip the internal transmission entirely. If you face an emergency clearance issue, it is safer to disconnect the mechanical linkage pin. Once disconnected, push the board up freely and secure it firmly with heavy-duty zip-ties until you can install a replacement part.
A: No, you do not need to replace both simultaneously. The driver and passenger side systems operate independently on separate control circuits. One motor failing does not directly impact the lifespan of the other. You should save your money and replace only the specific unit that has failed or begun grinding.
A: You should lubricate the pivot points every six months. If you live in an area with heavy winter road salt or frequent mud exposure, increase this to every three months. Use a dry-film silicone or PTFE-based spray. Wet grease attracts abrasive dirt, which eventually binds the hinges and burns out the motor.
A: This usually happens for two reasons. You may have accidentally installed a passenger-side motor on the driver side, as the internal polarity is mirrored. Alternatively, the aftermarket manufacturer may have wired the internal connector backward (reverse polarity). Check the part numbers first. If the part is correct, you may need to swap the two power wires in the harness plug.


