
Views: 0 Author: Site Editor Publish Time: 2026-06-17 Origin: Site


Power running boards add incredible convenience to modern trucks and SUVs. They also elevate the visual appeal of your vehicle. However, replacing a burned-out system brings intense frustration. You often face staggeringly high repair bills. You cannot treat routine care as an optional detailing task. It serves as a mandatory risk mitigation strategy. This proactive care prevents structural binding. It also stops internal burnout effectively. Proper upkeep dramatically extends operational lifespan. Neglecting the mechanical hinges will inevitably destroy even a healthy deployment mechanism. In this guide, we uncover hidden signs of mechanical fatigue. You will learn exact step-by-step protocols. These procedures keep your retractable boards deploying smoothly under harsh environmental conditions. We also explore proper failure diagnostics. You can catch problems before they demand complete system replacements. Protect your automotive investment starting today.
Hinge binding is the primary cause of side step motor failure; keeping hinges clean reduces the electrical load on the motor.
Heavy greases and penetrating oils (like traditional WD-40) attract grit and accelerate wear; use only dry silicone or PTFE-based lubricants.
Motor maintenance should be performed quarterly, or monthly in regions with heavy road salt, mud, or snow.
Grinding noises, stuttering deployment, or extreme heat from the motor housing are indicators that preventative maintenance may no longer be sufficient and a replacement evaluation is necessary.
Catching early warning signs saves significant money. You must monitor vehicle behavior constantly. Small changes often indicate growing mechanical stress.
Normal deployment emits a smooth, quiet hum. Listen closely for critical warning sounds during daily operation. Grinding gears suggest internal stripping. Clicking relays indicate electrical resistance or poor grounding. Groaning sounds during retraction point to severe mechanical strain. You should never ignore these auditory red flags. They represent the first cry for help from your equipment.
Observe both sides of your vehicle regularly. Identify any slow or stuttering deployment immediately. Incomplete extension often plagues one side first. Compare the passenger side against the driver side daily. Asymmetry acts as an obvious visual indicator. A sluggish passenger board usually means the pivot points have packed full of road grime. Ignoring this asymmetry forces the internal components to work exponentially harder.
Check the casing physically after a few deployment cycles. Excessive heat on the casing signals immediate danger. This heat indicates dangerously high amperage draw. Mechanical resistance in articulating hinges usually causes this massive power spike. Your wiring harness might also feel unusually warm to the touch. A hot mechanism means it sits right on the edge of permanent failure.
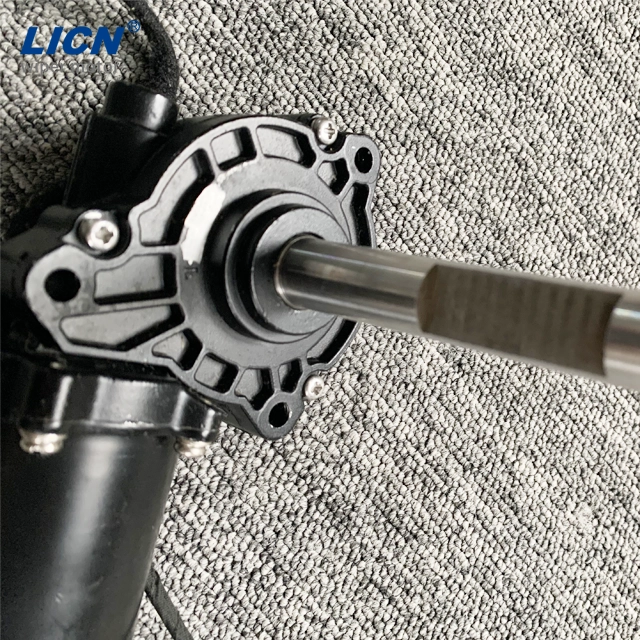
Every retractable mechanism faces harsh environmental elements. Understanding these vulnerabilities helps you prevent premature breakdowns. Ignorance often leads to expensive repairs.
Road salt aggressively attacks undercarriage components. High-pressure car washes blast moisture past weather seals. Degraded rubber seals invite water directly inside the housing. This water ingress leads to immediate internal shorting. Brush corrosion rapidly follows initial water exposure. Once moisture breaches the barrier, deterioration accelerates rapidly. You must protect these seals from direct high-pressure spray.
Neglected pivot joints eventually seize entirely. These stuck hinges transfer extreme torque loads. The pressure moves directly into internal gears. Many OEM designs utilize plastic gears. Continuous strain easily strips these weak materials. Replacing the Side Step Motor becomes inevitable once gear teeth shear off. You cannot reverse stripped gears through lubrication. Prevention remains your only defense against this specific failure mode.
Oxidation attacks vulnerable wiring harness connections relentlessly. Dirty plug terminals severely limit operating voltage. Voltage drops force components to draw higher amperage. Poor grounding sometimes mimics a completely dead unit. Check your wire harness before assuming mechanical failure. Green corrosion on copper pins blocks power transfer completely. Simple cleaning often restores full functionality.
Common Failures and Direct Impacts | ||
Failure Cause | Direct Symptom | Ultimate Consequence |
|---|---|---|
Seized Pivot Joints | Slow deployment, groaning noise | Stripped internal gears |
Degraded Weather Seals | Intermittent operation | Internal shorting and brush corrosion |
Terminal Oxidation | Clicking sound, no movement | Melted harnesses or burnt relays |
Executing a structured routine guarantees optimal performance. Follow these detailed steps exactly. We recommend wearing safety glasses during this process to prevent debris from entering your eyes.
You must establish a safe working environment first. Accidental deployment can cause severe hand injuries.
Deploy the boards fully using your vehicle controls.
Disconnect the main battery power or remove the specific system fuse. This action prevents accidental retraction during cleaning.
Use a gentle power washer or garden hose. Clean the hinge assemblies thoroughly.
Wash the exterior housing gently. Remove all packed mud and road debris.
Avoid blasting direct high pressure onto sensitive electrical connectors.
Pinpoint the exact clevis pins requiring lubrication. Identify all moving pivot points underneath the vehicle. Find the articulating linkages. Apply lubricant exclusively to these metal friction zones. Proper Motor Maintenance requires careful precision.
Crucial Warning: Never apply spray directly onto electrical housings. Keep wet chemicals away from wiring harnesses. Solvents can degrade rubber grommets quickly. Use a localized spray straw to control application exactly where you need it.
Work the new lubricant into the hinges manually. Grab the board firmly. Move the board up and down by hand. This action ensures deep penetration into tight pins. Restore the electrical power safely. Cycle the boards electronically five to ten times. Verify smooth, even distribution across all joints. You should notice a significant reduction in deployment strain immediately.
Fluid selection dictates the ultimate success of your efforts. The wrong spray causes catastrophic damage over time.
Many owners reach for standard penetrating fluids initially. Some apply wet lithium or chassis grease. These heavy substances act as aggressive dirt magnets. They trap abrasive grit inside tight mechanical clearances. This mixture creates a highly destructive grinding paste. Seized hinges inevitably follow this mistake. In freezing temperatures, wet grease thickens rapidly. Thick grease prevents boards from dropping down entirely.
Mechanical joints structurally require dirt-repellent properties. You must use dry-film lubricants exclusively. PTFE and Teflon sprays offer excellent protection against friction. Premium dry silicone serves as another ideal option. These sprays leave a slick, non-sticky coating. They repel dust, sand, and winter road salt effectively. Reapply these coatings every three months for maximum defense.
Connections occasionally suffer from invisible moisture buildup. You need specialized dielectric cleaners for these areas. Unplug the wiring harness carefully. Spray the dielectric cleaner directly onto metal pins. Let the fluid evaporate completely. This prevents harmful voltage drops. It ensures maximum electrical transfer to the drive unit. Apply a small dab of dielectric grease around the rubber seal before reconnecting the plug.
Maintenance Fluid Selection Guide | ||
Fluid Type | Recommended Use | Drawbacks / Warnings |
|---|---|---|
Standard WD-40 / Solvents | Rust breaking only | Attracts dirt; creates abrasive paste; dries out joints. |
Wet Lithium Grease | Do not use on step hinges | Thickens in extreme cold; traps sand and grit heavily. |
Dry PTFE / Teflon Spray | Primary hinge lubrication | Requires clean surface before application. |
Dielectric Contact Cleaner | Wiring harness pins only | Keep away from painted surfaces. |
Sometimes preventative care arrives too late. You must evaluate repair viability realistically. Throwing money at a completely dead unit wastes valuable resources.
A slow-moving board requires immediate diagnosis. You must determine the root cause quickly. Dirty hinges represent a highly fixable issue. A fundamentally compromised internal mechanism requires full replacement. Do not waste expensive dry lubricants on a unit emitting loud grinding noises. Grinding indicates missing metal material inside the gearbox.
Try this simple diagnostic procedure today to verify component health.
Disconnect the power running board from its primary drive linkage.
Swing the heavy board manually back and forth.
It should move freely without physical resistance.
Reconnect the linkage securely.
Cycle the power. If the board stutters during powered deployment, internal gearing is likely failing.
Compare OEM components against aftermarket alternatives carefully. Factory replacements often carry massive premium price tags. Upgraded aftermarket units frequently feature improved weather sealing. Consider expected lifespan against immediate retail pricing. Sometimes an aftermarket unit offers superior brush designs. Better designs handle extreme weather conditions much more effectively.
Assess actual labor requirements accurately before proceeding. Dealerships charge premium hourly labor rates. Experienced DIY mechanics can often swap these units at home. Evaluate your personal toolset. Consider your mechanical comfort level. Replacing an entire assembly typically takes two hours. It requires basic sockets, safe vehicle lifting, and patience. Doing it yourself saves hundreds of dollars in shop fees.
Consistent, specific care remains the only proven method to protect your power running board investment.
Use dry-film lubricants exclusively to avoid creating destructive, gritty paste inside tight articulating hinges.
Perform regular acoustic and thermal inspections to catch early warning signs of internal gear fatigue.
Execute the free-hinge test periodically to separate simple dirt issues from fatal mechanical gear failure.
Audit your vehicle’s system today. If terminal symptoms already exist, begin exploring reliable aftermarket replacement options immediately.
A: No. Standard WD-40 is a solvent, not a long-term lubricant, and will attract dust and road grime, ultimately causing the hinges to bind and overwork the motor.
A: Quarterly under normal driving conditions. If you frequently drive off-road, in snow, or in areas heavily treated with road salt, maintenance should be done every 4 to 6 weeks.
A: Usually, no. A clicking sound without movement typically indicates either a blown fuse, a degraded electrical ground, or internally stripped gears inside the motor, pointing toward replacement rather than routine maintenance.


